Adding Members to a Team
Inviting new members to your GovDash team is a quick and easy process. You can invite as many members of your team to GovDash as you’d like at no extra charge. Please follow along with the written steps below.
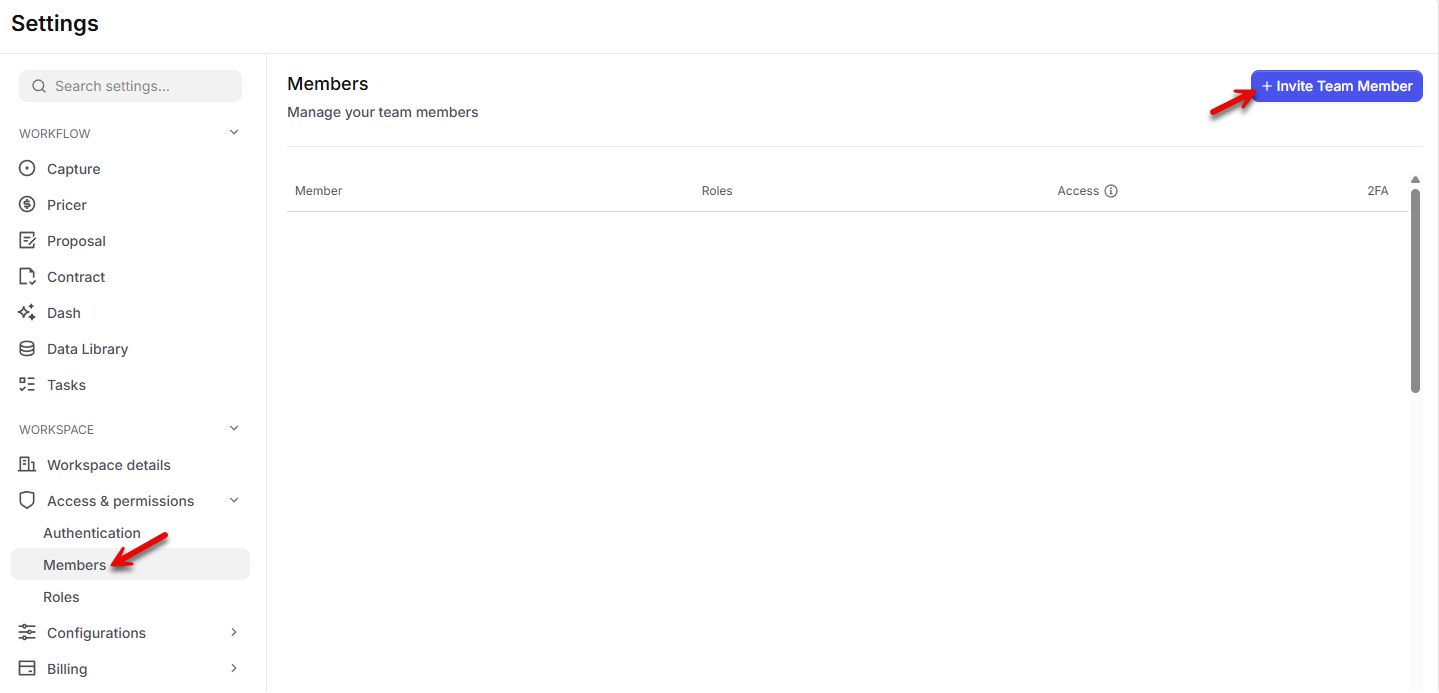
Open Settings from the bottom left corner of GovDash
Select Access & permissions > Members on the left hand side of Settings
Click the Invite Team Member button in the top right
Enter the team member's email address in the Email box (which is the address that they will sign in with and will receive the welcome email to)
Next, assign them a role. You can assign more roles later. For more information on GovDash roles, permissions, and creating custom roles, please see our support article here.
When finished, click the Invite button to invite your team member to GovDash.
Once the team member receives the welcome email and logs into GovDash, they will set up their profile through our account onboarding process.
Finding and Managing Members
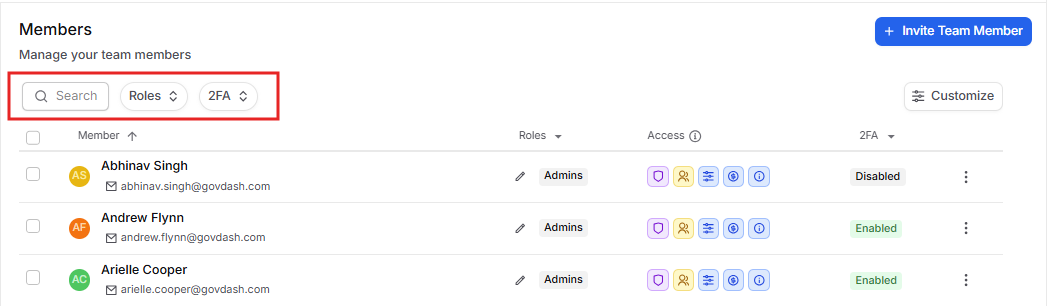
As your team grows, the Members page makes it easy to find exactly who you're looking for. Above the members table you'll find a search box and filters, and every column header can be sorted. Each row shows the member's name and email, their Roles, an Access summary, and their 2FA status.
Removing Multiple Members at Once
If you need to remove several people from your team, you don't have to do it one at a time:
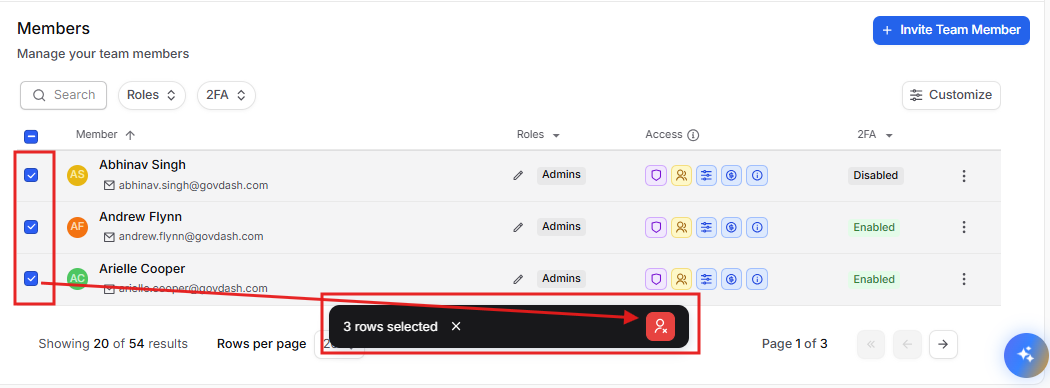
Tick the checkbox at the start of each member's row that you want to remove. (Your own row can't be selected.)
Click the Remove from team button that appears in the bulk-actions bar.
Review the confirmation dialog, which tells you how many members you're about to remove, and confirm.
The selected members are removed from your team in a single step.
Note: Only members with permission to manage team members will see the selection checkboxes, the Remove from team action, and the Invite Team Member button