GovDash allows you to assign roles, define permission sets, create custom roles for your team, and assign one or more roles to each team member, giving you deep levels of customization and flexibility to limit your team’s ability to influence different areas of GovDash.
Accessing Roles
To access Roles, navigate to Settings > Access & permissions > Roles in GovDash.
Default Roles & Permissions
By default, GovDash provides you with a set of roles and permissions that have preset limitations, which are as follows:
Role | Permission Details |
|---|---|
Admin | Add or remove users, change system settings, and access all data and functions within GovDash. Required permission to connect and configure integrations. |
Editor | Create, modify, and delete content within GovDash, but cannot edit Team level settings (Team details, integrations, authentication settings, etc.) or manage users. |
Reader | View content, but cannot make any changes or edits to any data within GovDash. |
Editing Default Roles Permission Settings
You can adjust the permission settings of these default roles by clicking the three-dot action icon > Edit Permissions under Access & permissions > Roles in Settings. You may also access it by clicking on the key icon next to the permission count.
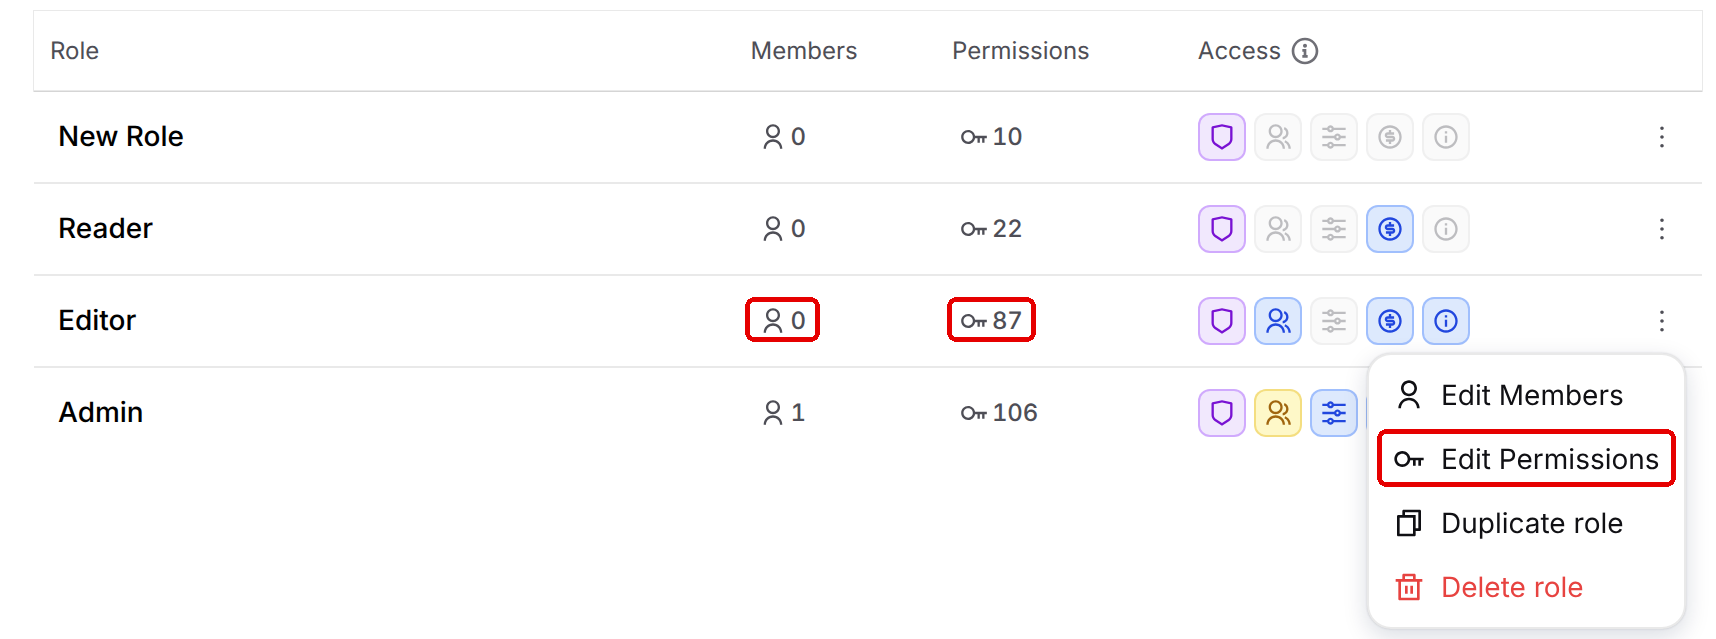
Within the role permissions window, you can set per GovDash-area permissions for that specific role.
Assigning Roles
Using the member icon  , you can quickly add and remove users assigned to a specific role.
Creating and Assigning Custom Roles
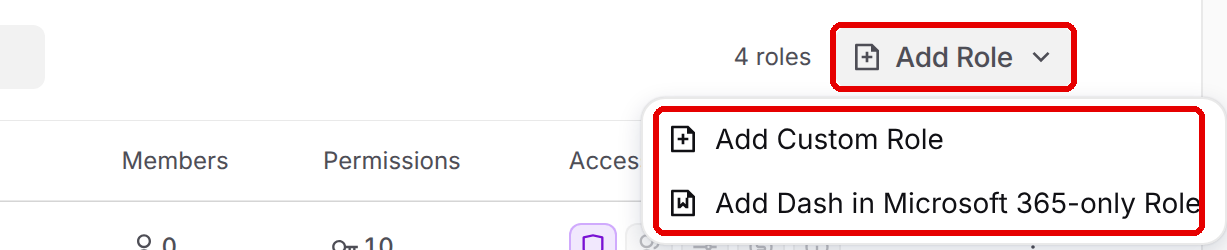
To create custom roles, select Add Role in the top right, then Add Custom Role. You can click the role’s name to change it as needed.
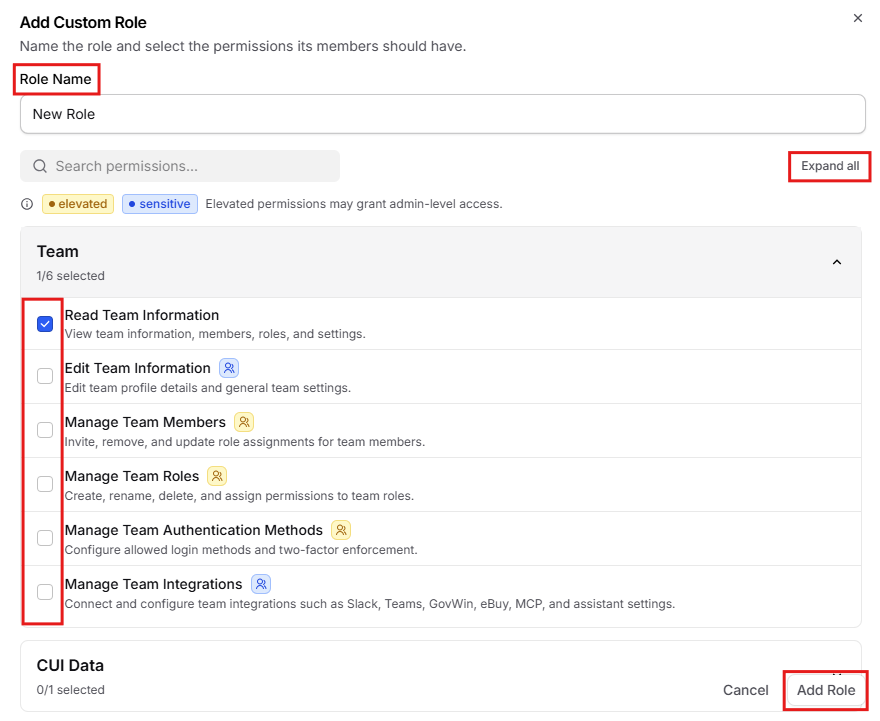
The Add Custom Role window lets you name your role and choose its permissions together, so your new role is ready to use the moment it’s created:
1. In Role Name, enter a name for the role (for example, “Proposal Manager”).
2. Use the Search permissions... box, or click Expand all, to find the permissions you want to grant.
3. Select each permission the role’s members should have. Some permissions automatically include the ones they depend on, for example, selecting Edit in Capture also selects Read in Capture.
4. Click Add Role. Your new role appears in the roles list with its permissions already in place.
Why is the Add Role button unavailable?
The Add Role button in the window becomes clickable once you’ve entered a role name and selected at least one permission.
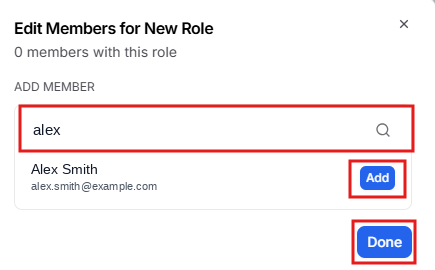
Next, using the member icon, you can populate the role member list by searching for name or email and clicking Add. Each member receives all permissions from all roles they are assigned.

Duplicating a Role
Need a role that’s almost the same as one you already have? Instead of selecting every permission again, duplicate the existing role and adjust only what’s different.
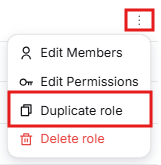
Under Access & permissions > Roles in Settings, click the three-dot action icon next to the role you want to copy.
Select Duplicate role. The Duplicate Role window opens with the Role Name pre-filled as the original name followed by “(copy)”, for example “Editor (copy)”, and the original role’s permissions already selected.
In Role Name, rename the role as needed (for example, “Proposal Editor”).
Use the Search permissions... box, or click Expand all, to review the copied permissions, then select or clear any you want to change.
Click Add Role. Your new role appears in the roles list with its permissions in place, and the original role stays exactly as it was.
The new role starts without any members, so use the member icon to add the team members who should have it.
Dash in Microsoft 365-only Role
A special role limits members of your team to Dash in Microsoft 365 only. To create it, select Add Role > Add Dash in Microsoft 365-only Role. This role can't be edited or duplicated.
Users with this role can only sign in to Dash in Word, PowerPoint, and Excel. Any link that takes them to GovDash shows a message explaining their role.
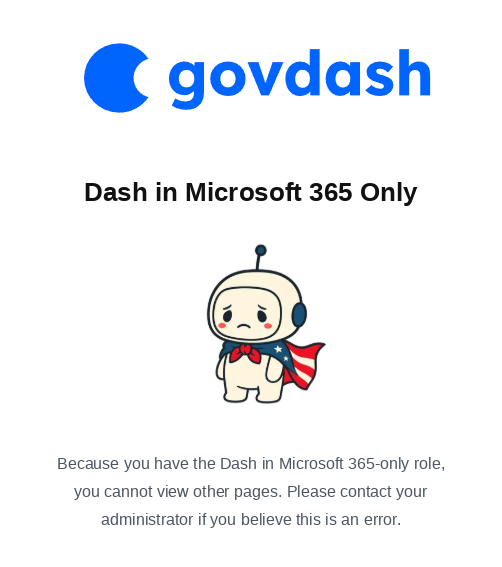
By default, users with only the Dash in Microsoft 365-only role cannot access CUI. You may assign them an additional role with the “Access CUI Data” permission to grant access.
CUI Permissions
The CUI Access permission controls whether a user can work with Controlled Unclassified Information in GovDash. Admins use this permission to designate which team members are cleared to view and act on CUI data. Users without the permission are blocked from CUI content throughout the application.
Configuring access
Admins enable or disable CUI Access permission on a per-role basis. The setting governs all CUI-related interactions across the product.
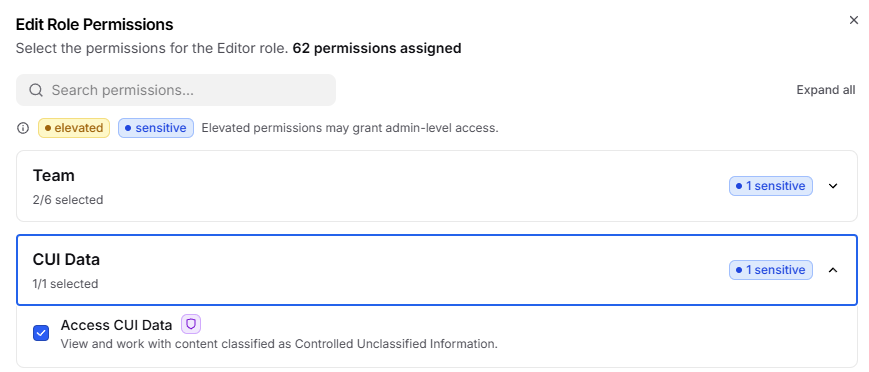
With CUI Access
Users with CUI Access can view, upload, classify, and report on CUI data without restriction.
Without CUI Access
Users without CUI Access cannot:
View CUI documents or any product surfaces (Contract records, Capture opportunities, Proposal responses, etc.) that display CUI content
Upload files classified as CUI or apply CUI classifications
Change existing CUI classifications
Report on CUI records
Receive CUI content through Dash responses