Overview
Forms give you a simple way to collect the information and documents you need from other people, both inside and outside your workspace. Instead of chasing details over email, you build a form once, share a secure link, and let teaming partners, subcontractors, key personnel, or teammates submit their answers and files directly. Every submission lands in one place where you can review it and, when it looks good, approve it to bring the data into GovDash.
Forms live in your Data Library alongside Documents, People, Companies, Agencies, and Agreements.
Finding the Forms page
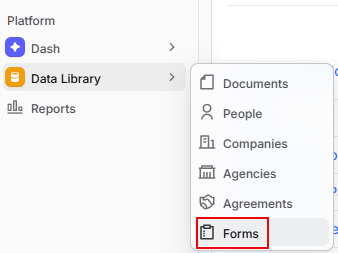
Open the Data Library from the left-hand navigation, then select Forms. You’ll see a table of all the forms your team has created, with each form’s title, description, created date, due date, whether it’s published, and how many responses it has received.
Creating a form
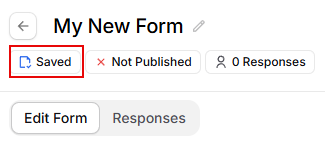
Click Create Custom Form in the top right of the Forms table. GovDash creates a new draft form and opens the form editor, where you can rename it and start adding content. Your changes save automatically. Look for the Saved indicator near the form title.
Building your form
In the editor, give your form a clear title and an optional description so recipients know what you’re asking for. Then add questions to gather exactly the information you need.
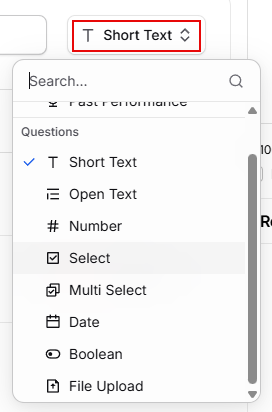
Each question can be one of several field types:
Short Text: A single line of text (e.g. a name or reference number).
Open Text: A longer, multi-line response.
Number: Numeric answers.
Select: Choose one option from a list you define.
Multi Select: Choose multiple options from a list you define.
Date: A calendar date.
Boolean: A simple Yes/No answer.
File Upload: Let the recipient attach one or more files.
You can mark questions as required and add validation rules (for example, restricting the accepted file types on a File Upload) so responses come in clean and complete.
Tip
Start from a template. When adding an item you can choose a template, such as Past Performance, to drop in a pre-built set of fields for a common request instead of building it question by question.
Previewing your form
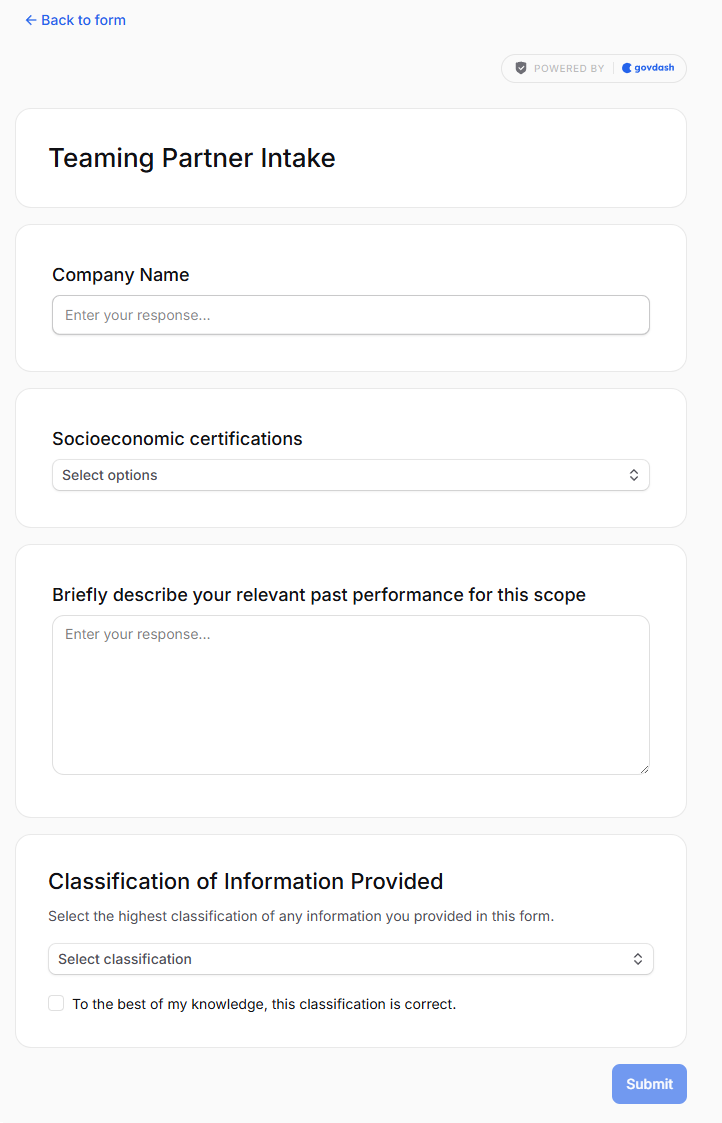
At any time, click Preview to open the form exactly as a recipient will see it. Use this to check your wording, question order, and required fields before you publish.
Publishing and sharing your form
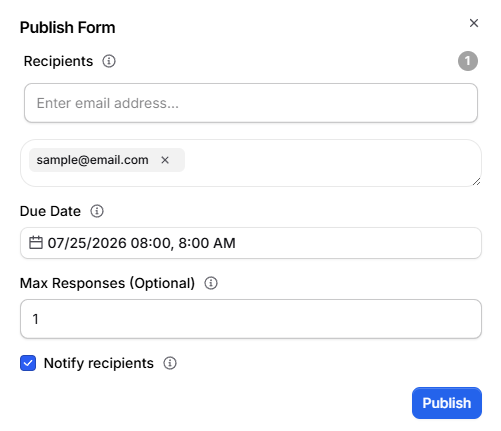
When your form is ready, click Publish to open the publishing options:
Recipient emails: Add the email addresses of the people allowed to respond. Only these addresses can open and submit the form.
Due Date: The date and time after which the form can no longer be submitted.
Max Responses (optional): Cap the total number of responses the form will accept.
Notify recipients: When checked, GovDash emails the response link to your recipients so they can get started right away.
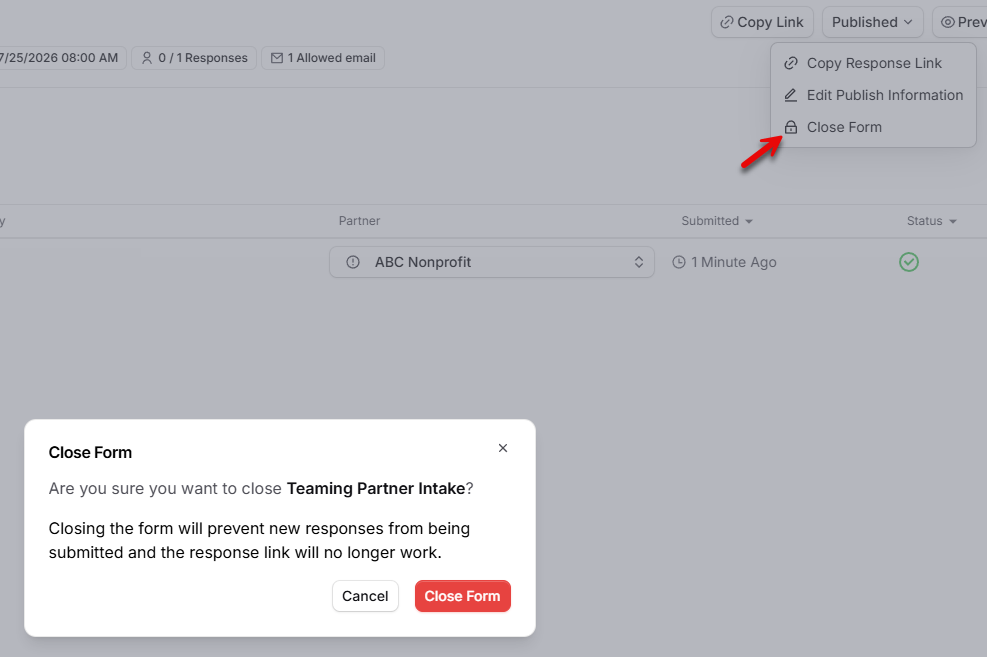
Once published, the form status changes to Published. Use the Published menu to Copy Response Link (to share it yourself), Edit Publish Information (to change recipients, due date, or limits), or Close Form.
How recipients respond
Recipients don’t need a GovDash account. When they open the response link, they enter their email address and receive a one-time passcode by email. After entering the passcode to verify their identity, they can fill out and submit the form. Access is limited to the email addresses you added, and the form automatically stops accepting responses once it passes its due date or reaches its response limit.
Reviewing responses
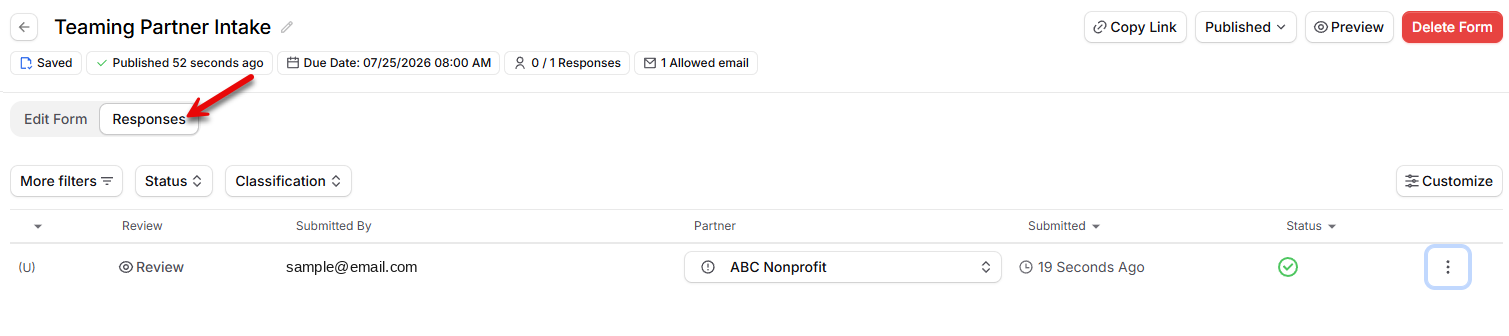
Open a form and switch to the Responses tab to see every submission. Click a response to open its detail panel, where you can read each answer and open any uploaded files. Uploaded files are automatically scanned before you can access them.
Each response starts as Pending. Review it, then Approve or Reject it. Approving a response brings its data into GovDash (for example, uploaded documents are added to your Data Library, and template responses such as Past Performance are turned into the corresponding records) so the information you collected is immediately usable across the platform.
Editing, closing, and deleting a form
You can keep managing a form after it’s live:
Edit Publish Information: Add recipients or adjust the due date and response limit from the Published menu.
Close Form: Stop accepting new responses. The response link stops working, but existing responses are kept.
Delete Form: Click Delete Form at the top right of the form to remove it entirely.