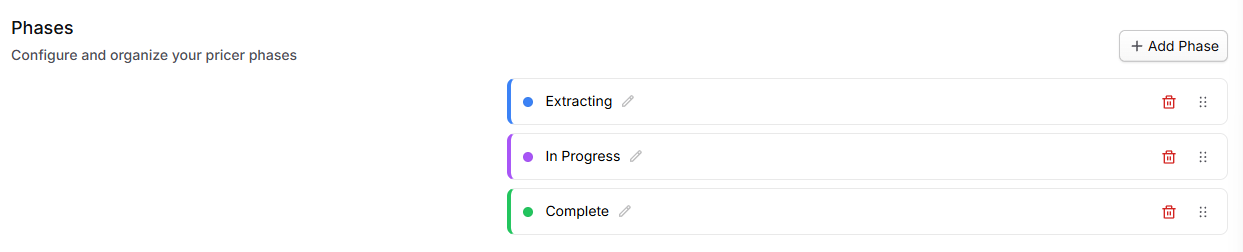
The Pricing Settings page is the team-level workspace for Pricer phases, allocation bases, and reusable indirect-rate templates. These settings control how workbooks move through the Pricer dashboard, what cost elements each indirect rate multiplies, and which approved rate stacks can be copied into opportunities.
Templates are designed to make pricing setup faster and more consistent. Instead of rebuilding the same Fringe, Overhead, and G&A structure every time you price a contract, your team can apply a prebuilt template and adjust only what is specific to the opportunity.
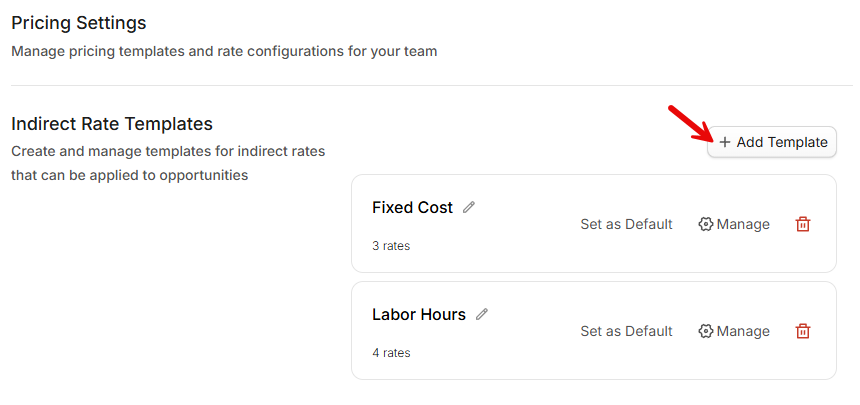
Indirect rate templates are managed in Settings, then applied from within the Indirect Rates tab in an opportunity.
What Indirect Rate Templates Are Used For
Indirect rate templates help teams:
Standardize wrap rate assumptions across bids
Reduce repetitive setup work for pricing analysts
Improve consistency across contract pricing models
Apply an approved baseline stack, then adjust as needed per opportunity
Templates are especially useful when your organization uses the same indirect structure across most proposals.
Creating a Template
To create a new indirect rate template:
Navigate to Settings > Pricer under Workflow settings.
Click Add Template.
Enter a template name.
After you select Create, the new template opens in Edit Template. Add or remove rate rows, then select Save Changes. Select Cancel or close the dialog to discard unsaved editor changes.
To rename an existing template, select its name beside the pencil icon and save the inline edit.
Setting a Default Template
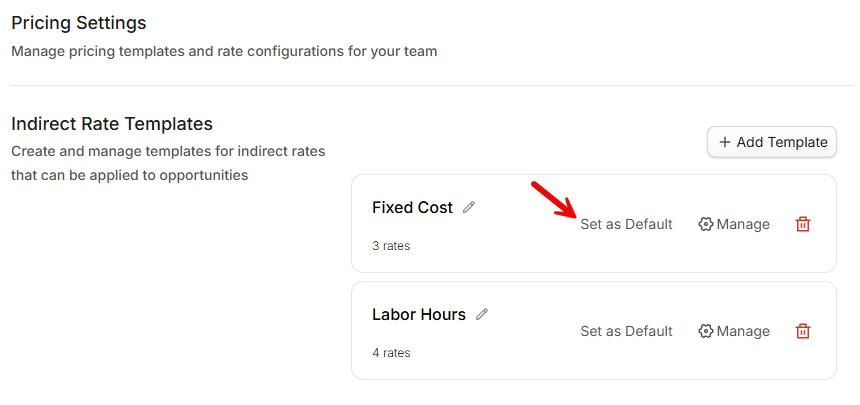
Teams can mark one template as the default. A default template helps establish a standard starting point for pricing assumptions. While you can still choose other templates, having a default makes it easier for teams to apply consistent burden structures across opportunities.
Adding and Managing Template Rates
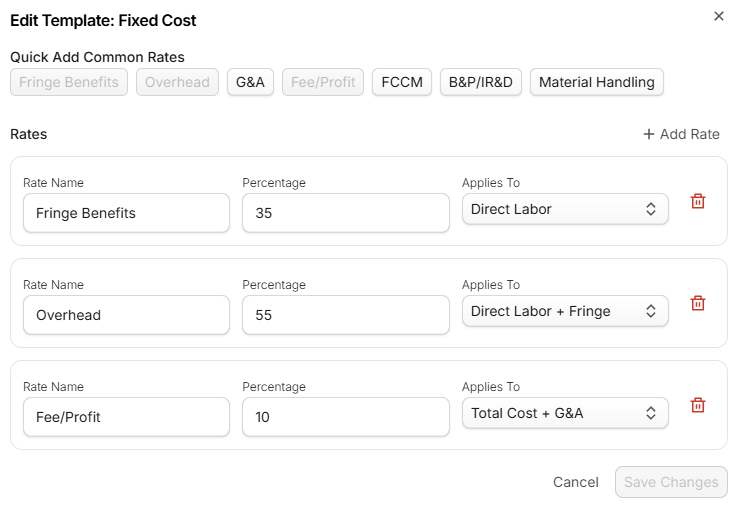
Within a template, you can build the indirect stack by adding rates such as Fringe, Overhead, G&A, and other indirect components.
Templates support both quick setup and detailed customization.
Using Quick Add
Templates include quick-add options for common indirect rates. These shortcuts make it faster to build a typical indirect stack without entering everything manually.
Adding Custom Rates
If your organization uses unique indirect components, you can add custom rate lines as needed by selecting Add Rate in the top right of the box.
Each template rate includes:
Rate Name
Percentage
Applies To (the rate's allocation base, including any custom bases your team has created)
You can edit any of these fields directly while managing the template.
Deleting a Template
Templates can be deleted as long as they are not the default template.
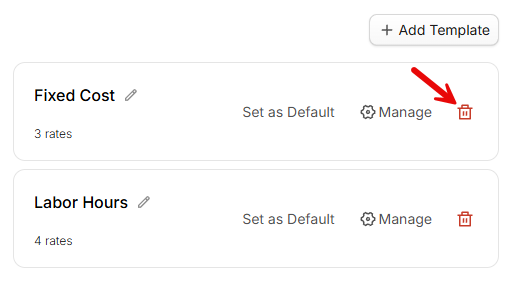
When deleting a template, GovDash displays a confirmation dialog with warning text. Deleting a template does not modify any opportunities where it has already been applied. It only removes the template from future availability.
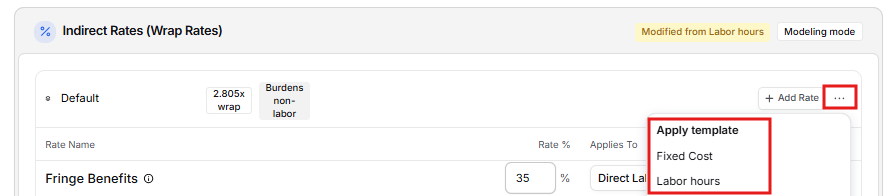
Applying Templates to an Opportunity
Templates are applied from within an opportunity on the Indirect Rates tab, not from Settings.
Managing Allocation Bases
An allocation base is the pool of costs that an indirect rate multiplies. Fringe is typically applied to direct labor, Overhead to direct labor plus fringe, and G&A to total cost input. Every rate on the Indirect Rates tab, and every rate in a template, is assigned to an allocation base.
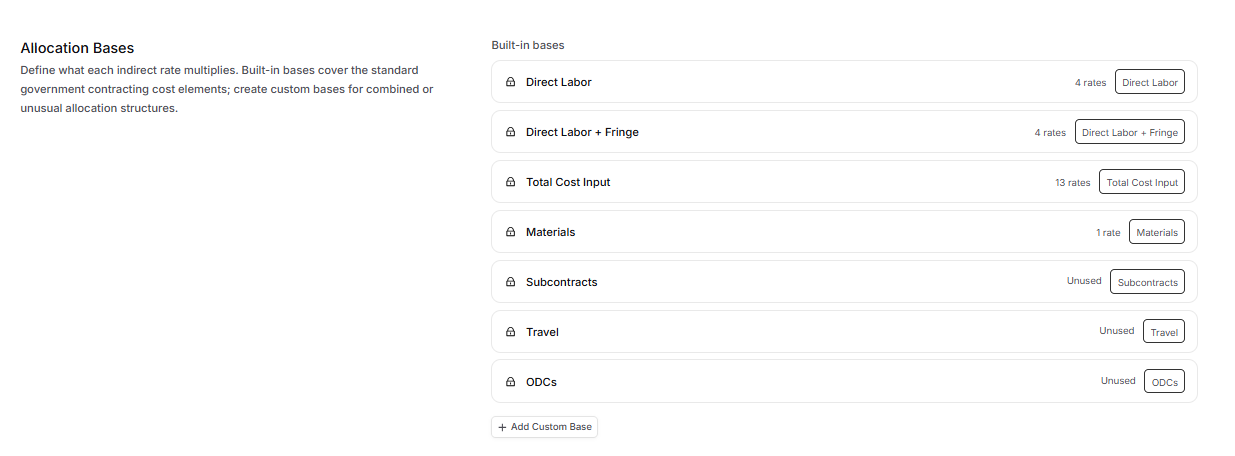
To find them, open Settings > Pricer and scroll to Allocation Bases.
Built-in Bases
Seven built-in bases are always available and cannot be changed or deleted:
Direct Labor: unburdened direct labor dollars (typical Fringe base)
Direct Labor + Fringe: direct labor plus the fringe applied to it (typical Overhead base)
Total Cost Input: fully burdened labor plus the non-labor costs your G&A Base setting includes (typical G&A base)
Materials: direct material dollars from line items
Subcontracts: subcontract dollars from line items
Travel: travel dollars from line items
ODCs: other direct cost dollars from line items
Each base shows the number of indirect rates that currently use it or Unused. The count includes rates in saved templates and rates in Pricer workbooks across the team.
Creating a Custom Base
Create a custom base when a rate should apply to a combination of cost elements, such as a material handling rate that also covers subcontracts.
In Allocation Bases, click Add Custom Base.
Enter a name, for example "Direct Labor + Subcontracts".
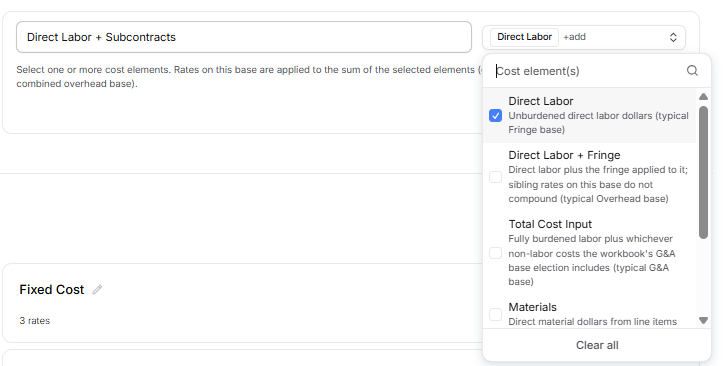
Under Cost element(s), select one or more cost elements. A rate on this base multiplies the sum of the elements you choose.
Click Create Base. The new base appears under Custom bases and is immediately available when you choose an allocation base for a rate on the Indirect Rates tab or in a template.
Editing or Deleting a Custom Base
Rename: click the base name under Custom bases and type a new name.
Change cost elements: open the base's Cost element(s) menu and adjust the selection. This immediately changes the math for every rate that uses the base, so review affected opportunities afterward.
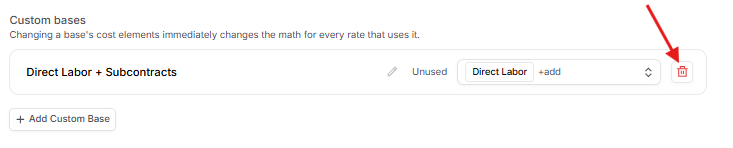
Delete: select the delete icon and confirm Delete allocation base. A custom base can be deleted only when its usage count is zero. While it is in use, the delete icon is disabled; its tooltip identifies how many rates must be reassigned or removed first. Built-in bases cannot be changed or deleted.
Only users with permission to manage Pricer settings can add, edit, reorder, default, or delete phases, allocation bases, and templates. Users with Pricer read access can review settings. Applying a template within an opportunity is a workbook edit and requires Pricer edit access.
Customizing Phases
Under Phases, you can fully customize the Pricer-specific phase names, colors, and order.